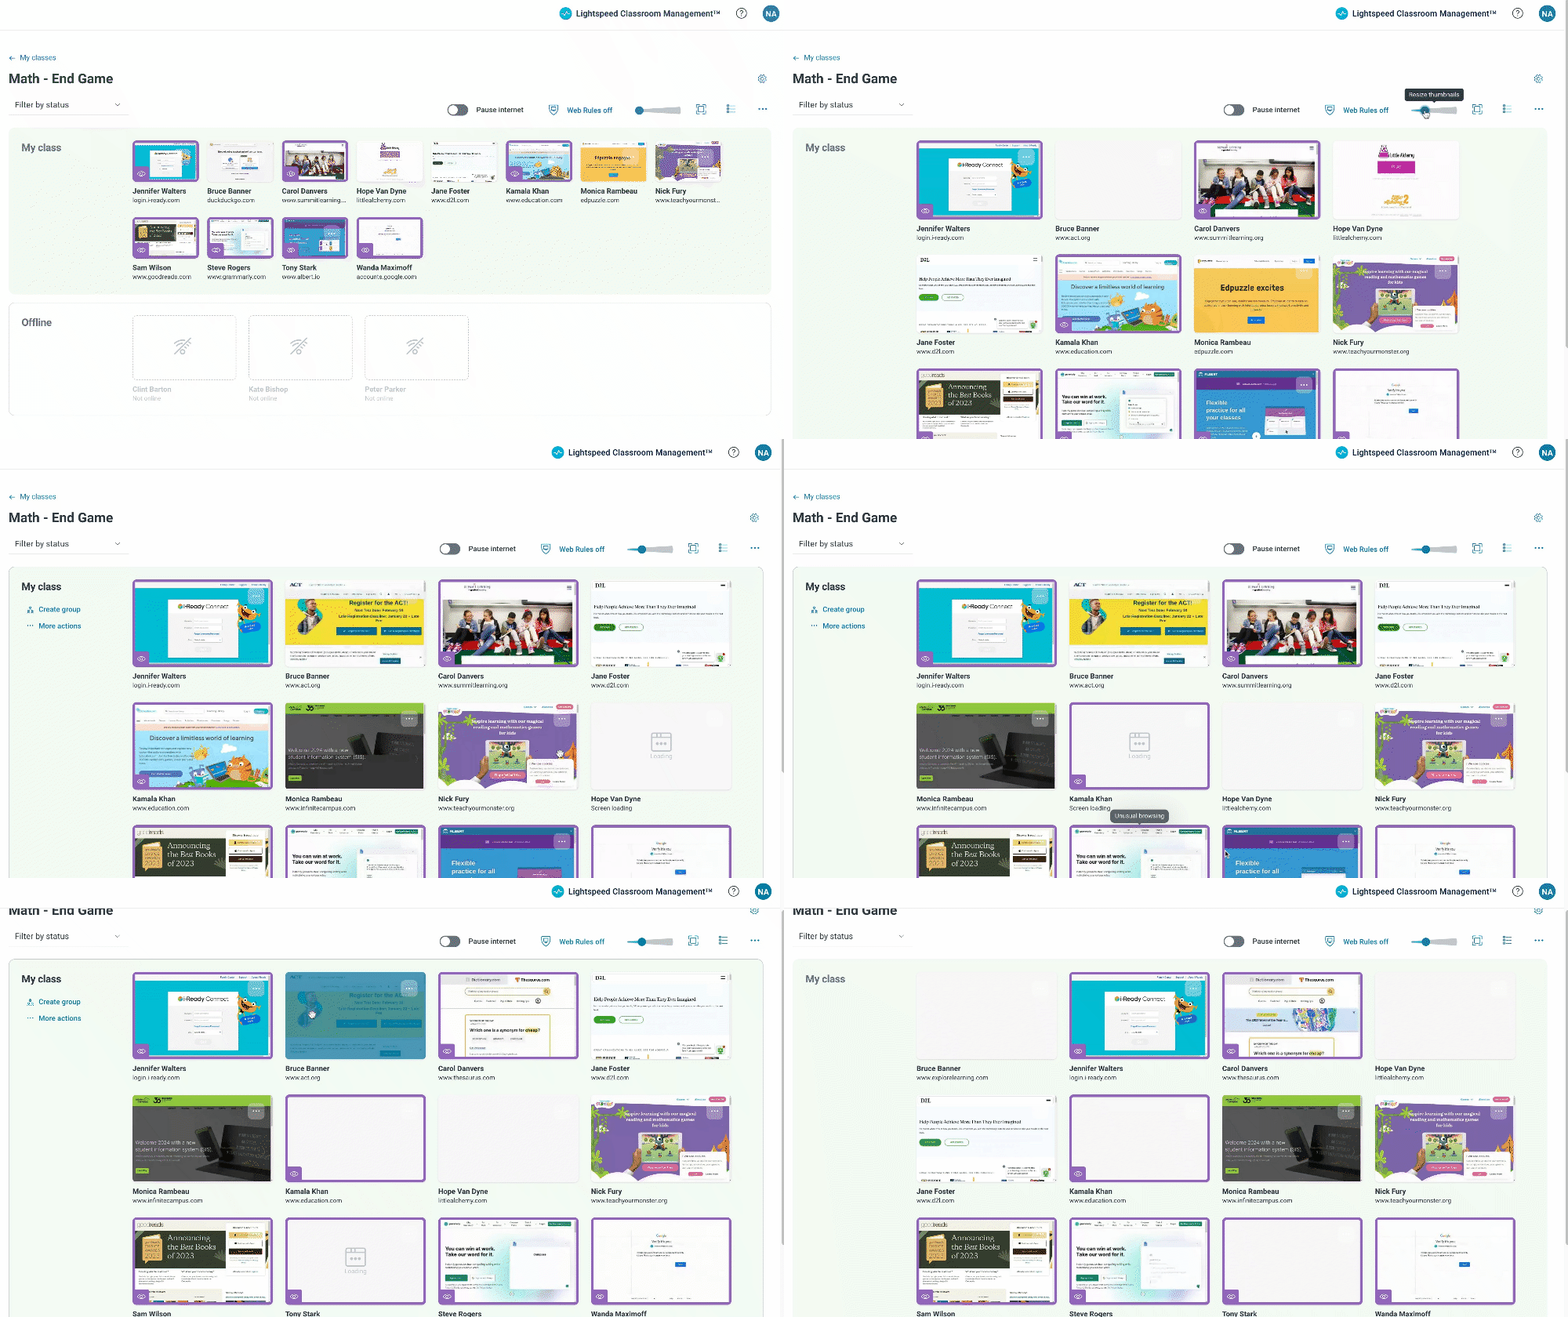
Did you know you can create a seating chart with Lightspeed Classroom Management? If you didn’t, then you’re certainly not alone!
When I speak to teachers about Lightspeed Classroom Management, I always like to show them this quick, easy-to-use feature that delivers all sorts of benefits. And, of course, a big part of the reason I like to demonstrate how to create a seating chart is that I get to see the pleasantly surprised, smiling expressions on teachers’ faces.
Using Lightspeed Classroom Management’s drag-and-drop user interface to create a seating chart is helpful when a teacher shares a class with another teacher, either regularly, in a class-share arrangement, or with a temporary substitute teacher. Creating the seating chart is easy.

Create a Seating Chart in Lightspeed Classroom Management
In Lightspeed Classroom Management, follow these simple steps to create a seating chart:
- Use the resize thumbnail slider provided in the interface to set the desired number of seats in each row. Slide it left or right until you achieve the desired configuration.
- Drag and drop each student’s name to the desired seat in the seating chart.
- Repeat this process until all students are appropriately placed.
Creating a seating chart with Lightspeed Classroom Management is just one of the features that teachers will find useful and beneficial. Check out the post, “10 Top Teacher Time-Saving Features of Lightspeed Classroom Management™.”
Additionally, if you’re a teacher or a school district IT (Information Technology) professional in a school system that does not deploy a classroom management solution, please refer to the post, “Classroom Management Software and its Importance in Digital Learning,” to learn of the tremendous benefits afforded to today’s digitally enabled classrooms.
Lastly, if you want more information on Lightspeed Classroom Management, please schedule a brief demo with one of our edtech experts.

